Overview
MenuPro is a menu creator that is simple to use but allows for great flexibility in customizing your menu design. It's different than most word-processing or template editors in 2 key ways:
1 It lets you keep your food items in a list (a database) that is always accessible. This lets you create menus by dragging from the list rather than retyping. The list also allows content and design to change independently, letting you change your menu design without having to edit your list, and vice versa.
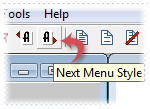
2 The design and layout of your menus is controlled by Menu Styles - blueprints that tell MenuPro what design elements to use and where they should go.
Menu Styles are more flexible than garden variety, word-processing style templates because:
- You're less restricted to how many items you can fit on the page.
- Your menu can be any page size since Menu Styles are size agnostic.
- You can preview and swap designs with 1-click using your actual menu text since all Styles are interchangeable.
- You can customize most elements of any Menu Style to create something truly unique.
The last point is particular important because it allows you to 'brand' your menus to match your restaurant's personality, so you can avoid being stuck with an unoriginal design.
